

Post by Obi Anne on Sept 14, 2013 16:33:23 GMT 1
I finally finished my jawa last week, and I've gotten it approved, so I thought that I could just as well write up a description of my build process. There can never be too many build threads for people searching for information about the costume.
I started off with this costume from a bit of different perspective. I needed another costume for the 501st, and I wanted a costume that didn't contain any fragile parts and would be easy to pack. A jawa to me is perfect for say Celebrations where I can bring one costume and yet be part of both the 501st and RL photos, as well as not having to worry about anything breaking. With that in mind I will admit that I haven't been really enthusiastic about the costume. One reason for that is also that I consider myself a seamstress and this costume was a bit too easy so the build process was never really challenging/interesting/fun. Anyway, here we go:
Choice of fabric
I searched for months for a fabric with a heavy twill weave, but just couldn't find anything heavy enough. Monk's cloth isn't an option, since it's not available here, I also have my reasons to really dislike monk's cloth as the default fabric for Tatooine costumes. I wanted to use just natural fibres, for comfort's sake. Natural fibres breathes and helps a lot with keeping the temperature down in the costume.In the end I found a cotton/viscose/linen mix with a heavy structure. I found the fabric at Broarne.se which carries quite a good selection of fabrics in pure natural fibres. The don't have large stocks, and when they run out they don't get more fabric in. So this specific fabric, that was called Asterix, isn't available anymore, just like I can't find the fabrics that bought there for my female tusken.
I dyed it using two packages of Herdins Natural Fibre in dark brown and half a package of Herdins Multifibre klarröd (red). In hindsight I could probably have used a bit more red to get a more brick coloured fabric.
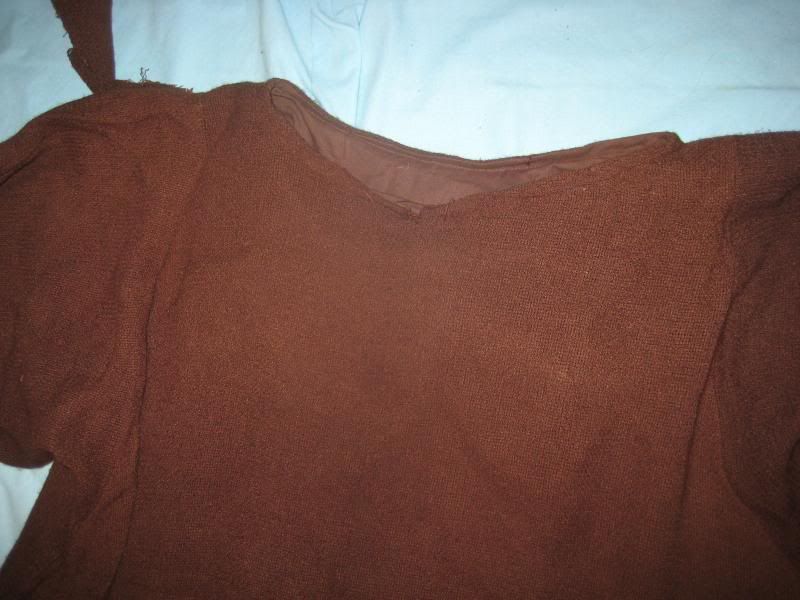
I laid the fabric on the floor and measured my own length, then I folded the fabric so I didn't get any shoulder seams. The fabric was just a bit too narrow for me to be able to make the body of the robe and the sleeves without any seams. I had to attach the sleeves separately, but I did attach them quite close to the neckhole in order to make the seam as invisible as possible.
![]()
One thing I added that I haven't seen anyone else do was the facing around the neckhole. The facing is just a piece of brown cotton that will make sure that the neckhole doesn't stretch under the weight of the robe. It's also more comfortable to have it direct on your neck, compared with a coarse fabric.
The hood is a rectangular piece of fabric. My main fabric is quite soft, so in order to make it more sturdy I flat lined it to a piece of brown cotton, before adding the lining to the hood. Around the face I made a channel and inserted a piece of synthetic whalebone between the lining and the main fabric. The hood ends in two long straps that are crossed and tied around the neck.
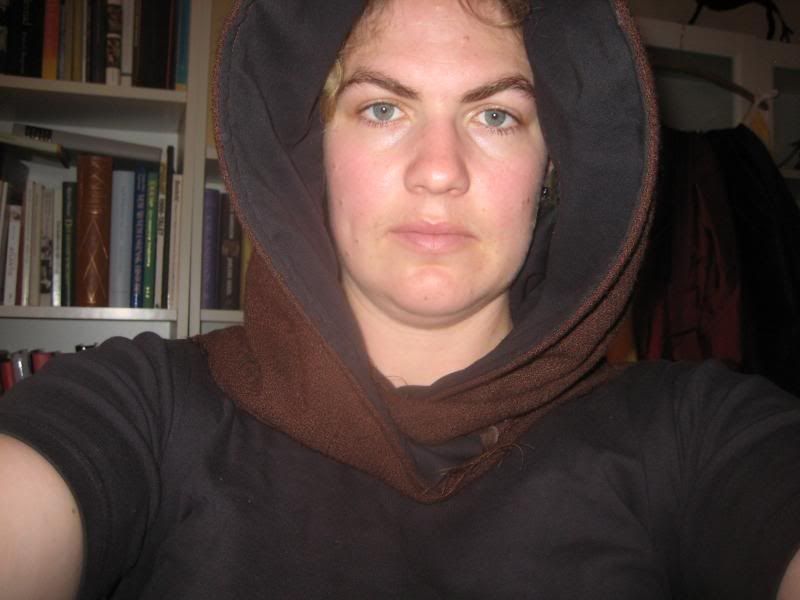
(excuse my shiny and grumpy face, but it's easier to see the construction with the face mask)
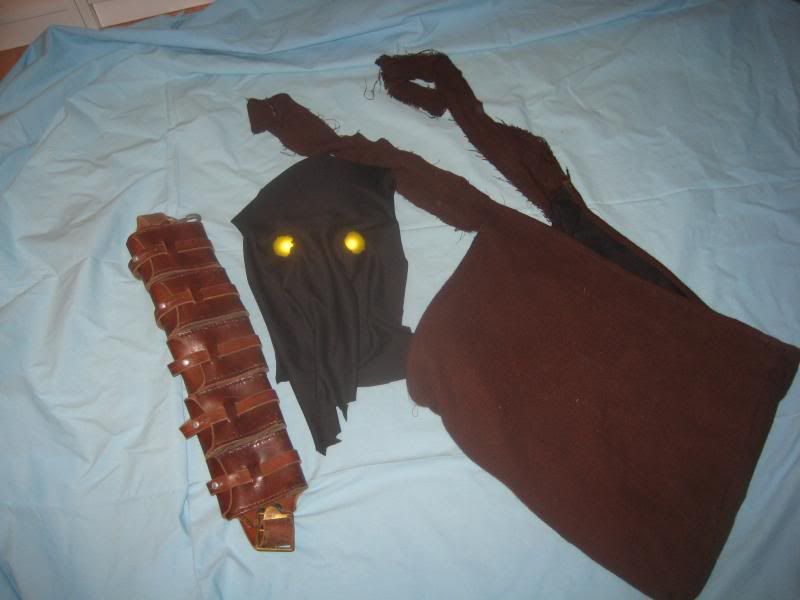
Here is a pic of my Swedish bandoliers, that I picked up at a tradera, the face mask and the hood. As you can see the hood is just a rectangle that's been folded in half.
The mask was my biggest challenges, simply because I don't know anything about wiring or working with hard materials. My saving came when I found these half globe lights at IKEA
![]()
The foundation of the mask is a halloween hockey mask. I cut off the nose and the bottom, to give me as much airflow as possible, I also cut out two holes where I wanted the eyes to be. I then attached the lights over the holes, but with the light switches in the holes.
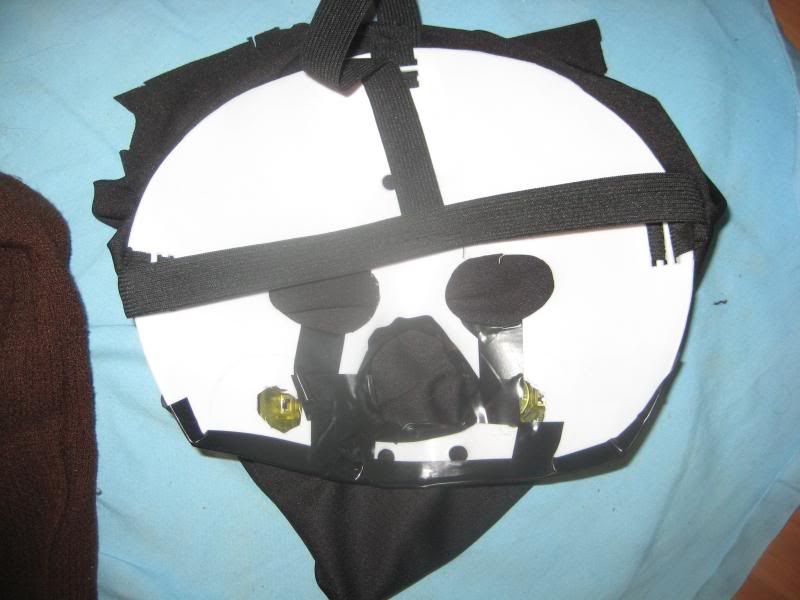
I used generous amounts of electric tape to soften the cut edges. Then I covered the whole fabric in black interlock fabric. Now the lights are a bit too big to be jawa eyes, so I covered the bottom of them with more black tape, and made sure that the wholes in the fabric weren't bigger than 1".
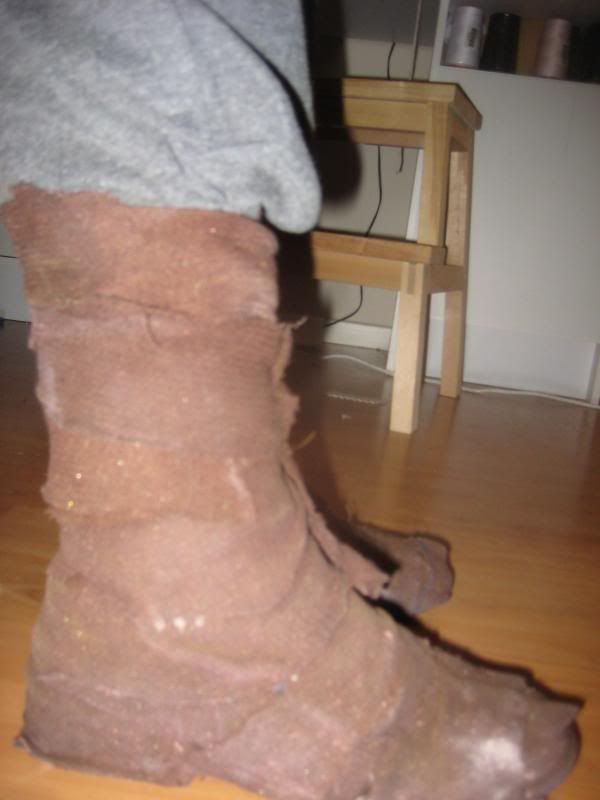
The boots were a pair of ankle boots with holes in them. I clued strips of fabric onto them, and also made them a bit taller with more fabric strips.
For weathering I had a friend borrow the robe and basically do some mudwrestling in it (she needed to borrow something I didn't mind if it got dirty)
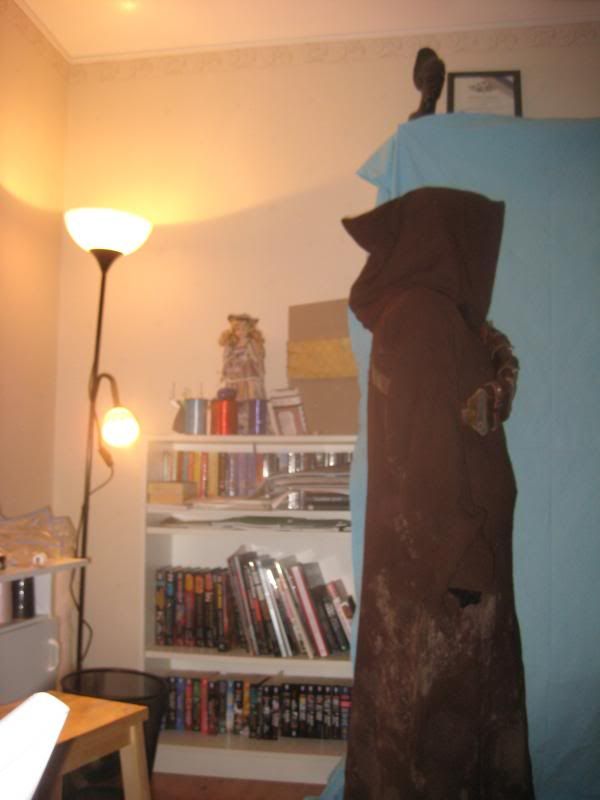
And here is the finished jawa

I started off with this costume from a bit of different perspective. I needed another costume for the 501st, and I wanted a costume that didn't contain any fragile parts and would be easy to pack. A jawa to me is perfect for say Celebrations where I can bring one costume and yet be part of both the 501st and RL photos, as well as not having to worry about anything breaking. With that in mind I will admit that I haven't been really enthusiastic about the costume. One reason for that is also that I consider myself a seamstress and this costume was a bit too easy so the build process was never really challenging/interesting/fun. Anyway, here we go:
Choice of fabric
I searched for months for a fabric with a heavy twill weave, but just couldn't find anything heavy enough. Monk's cloth isn't an option, since it's not available here, I also have my reasons to really dislike monk's cloth as the default fabric for Tatooine costumes. I wanted to use just natural fibres, for comfort's sake. Natural fibres breathes and helps a lot with keeping the temperature down in the costume.In the end I found a cotton/viscose/linen mix with a heavy structure. I found the fabric at Broarne.se which carries quite a good selection of fabrics in pure natural fibres. The don't have large stocks, and when they run out they don't get more fabric in. So this specific fabric, that was called Asterix, isn't available anymore, just like I can't find the fabrics that bought there for my female tusken.
I dyed it using two packages of Herdins Natural Fibre in dark brown and half a package of Herdins Multifibre klarröd (red). In hindsight I could probably have used a bit more red to get a more brick coloured fabric.
I laid the fabric on the floor and measured my own length, then I folded the fabric so I didn't get any shoulder seams. The fabric was just a bit too narrow for me to be able to make the body of the robe and the sleeves without any seams. I had to attach the sleeves separately, but I did attach them quite close to the neckhole in order to make the seam as invisible as possible.
One thing I added that I haven't seen anyone else do was the facing around the neckhole. The facing is just a piece of brown cotton that will make sure that the neckhole doesn't stretch under the weight of the robe. It's also more comfortable to have it direct on your neck, compared with a coarse fabric.
The hood is a rectangular piece of fabric. My main fabric is quite soft, so in order to make it more sturdy I flat lined it to a piece of brown cotton, before adding the lining to the hood. Around the face I made a channel and inserted a piece of synthetic whalebone between the lining and the main fabric. The hood ends in two long straps that are crossed and tied around the neck.
(excuse my shiny and grumpy face, but it's easier to see the construction with the face mask)
Here is a pic of my Swedish bandoliers, that I picked up at a tradera, the face mask and the hood. As you can see the hood is just a rectangle that's been folded in half.
The mask was my biggest challenges, simply because I don't know anything about wiring or working with hard materials. My saving came when I found these half globe lights at IKEA
The foundation of the mask is a halloween hockey mask. I cut off the nose and the bottom, to give me as much airflow as possible, I also cut out two holes where I wanted the eyes to be. I then attached the lights over the holes, but with the light switches in the holes.
I used generous amounts of electric tape to soften the cut edges. Then I covered the whole fabric in black interlock fabric. Now the lights are a bit too big to be jawa eyes, so I covered the bottom of them with more black tape, and made sure that the wholes in the fabric weren't bigger than 1".
The boots were a pair of ankle boots with holes in them. I clued strips of fabric onto them, and also made them a bit taller with more fabric strips.
For weathering I had a friend borrow the robe and basically do some mudwrestling in it (she needed to borrow something I didn't mind if it got dirty)
And here is the finished jawa


